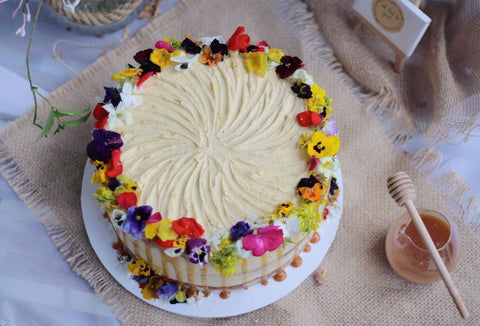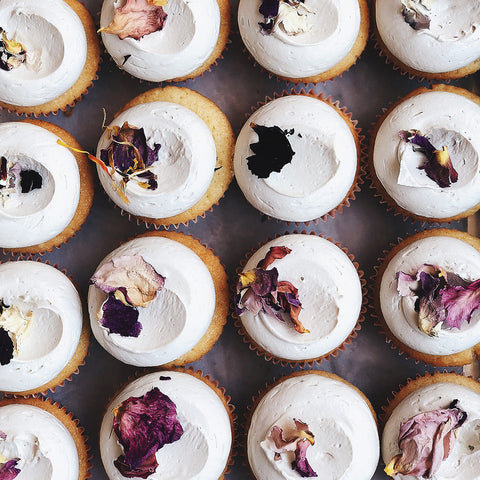
We were delighted to get to know Afra Abdeen of Oh The Be Good this month! Afra's story of a passion project that grew into a successful business is incredibly inspiring. Read on to find out more
Interviewing:
Afra Abdeen
Business name:
Oh That Be Good
Tell us about your story, how long have you been running your business, and how did you start?
Figuring out I had a knack for baking happened by chance a long time ago. It was the summer between finishing school and starting uni in New Zealand. My parents had this incredibly bored teenager driving them a little crazy. So my dad, a baker by trade, suggested we make a cake together for my cousin's bday. It's safe to say that through many arguments and the recreation of Scooby-Doo, a hidden skill was unearthed!
Oh That Be Good as you know it came to life in December 2016 - a year after I moved to Sydney. It started as a way for me to commit to my creative outlet and stress buster - baking. I needed this to have the emotional capacity to support my family as my dad battled through cancer. In late 2017, he went into remission, and Oh That Be Good had become more than just a passion project thanks to a wonderful group of humans that kept supporting me.
Last year, I formally registered Oh That Be Good as a business. It means two things to me: a personal challenge to learn the ropes of small business by doing; and a promise to myself to keep nurturing something I love.
Your favourite cooking/baking ingredient, and why it’s your favourite:
Freeze dried fruit powders - they pack a punch in flavour and are so easy to work with. I love that it allows me to flavour my cakes naturally and it's something my customers enjoy. Don't get me wrong; fresh fruit is brilliant in its own right. I think every ingredient has a different role to play. I use fresh fruit for compotes and curds, and freeze dried to elevate the icing game. It's so versatile and reduces challenges of food waste and seasonality.
Your favourite Petite Ingredient flower, and why it’s your favourite:
Oh no! I have to chose one? Urmm....I think I have to pick Elderflower. It's tiny but mighty. There's something magical about its flavour and it's so pretty in an understated way.
The best thing about your business?
It allows me to support other makers and connects me with a community of powerful women. Through Oh That Be Good I have met some amazing creatives. Whether you call them mothers, bloggers, side hustlers or small business owners; they all have incredible spirit. It is so good to see that people give themselves permission to take their passions and turn it into enterprises. I am constantly awed and inspired.
We want to thank Afra for sharing her story with us! To see more of her amazing work visit:
And follow her on instagram
www.instagram.com/ohthatbegood
And now for her amazing recipe!
PINEAPPLE COCONUT CAKE
Ingredients
Coconut Cake
-
280 g Unsalted Butter
-
400 g Sugar
-
5 large Eggs at room temperature
-
1 tsp Vanilla Extract
-
390 g Plain Flour
-
1 Tbsp Baking Powder
-
1/2 Tsp Salt
-
1 Cup (240g) full fat canned coconut milk
-
2 Cups (170g) shredded sweetened Coconut
-
4-5 Tbsp Water
Cream Cheese Frosting
-
225 g cream cheese (softened at room temperature)
-
225 g White chocolate
-
60 g Icing Sugar
-
1 1/2 Tsp Vanilla Essence
-
100 - 200ml fresh cream
-
1 can of Pineapples, drained and chopped.
Pineapple Flowers
-
One small pineapple, de skinned, with pineapple eyes removed
-
100 g White Sugar
-
100 ml water
Method
Pineapple Flowers (make ahead of assembly day)
-
In a small saucepan, bring the sugar and water to a boil and set aside to cool.
-
Preheat oven to 120°C Fan Assisted. Place a wire rack over a large baking tray.
-
Using a sharp knife, cut pineapple into thin slices - ideally about 2mm-thick. The thinner the layers, the better they dry out. Don't worry if each slice starts off thick and slices off thinner as you go (my knife skills aren't fantastic). They will be usable.
-
Brush on sugar syrup to both sides of each pineapple slice and place on wire rack.
-
Bake in oven until slices are dry to touch, but still pale and flexible. This can take anywhere from 45 minutes to an hour. You should be able to lift each slice off the rack without tearing them. After 30 minutes, check the flowers and flip them over and dry for further 15 minutes. Remove from oven when they have reached your preferred texture.
-
To create the flower shape, take a cupcake tray and place a slice of pineapple in each cup. This will create the flower shape. Return to the warm oven, switch it off and leave it for 3 hours or overnight. Transfer to an airtight container if not using immediately. Tip: if you find that the flowers have become soft after drying, simply pop the oven on to 100°C and place them in the heat for about 5-10 minutes till they are firm and dry again.
Coconut Cake
-
Preheat the oven to 180°C/350°F. Grease and line three 8” round baking pans.
-
In a small bowl, combine the shredded coconut and water until the coconut is moist, and set aside. Note: this step is simply to add some moisture to desiccated coconut so it does not draw moisture away from cake. Add more water gradually if needed.
-
In a large bowl or the bowl of a stand mixer, beat the butter on medium speed until light and fluffy, about 4 minutes.
-
Scrape the sides of the bowl and add the sugar. Beat for an additional 2 minutes.
-
Add the eggs one at a time on low speed and beat to combine, scraping the sides of the bowl as needed. Stir in the vanilla extract.
-
In a separate bowl, combine the cake flour, baking powder, and salt. On low speed, beat half of the dry ingredients into the cake batter until just combined. Then stir in the coconut milk. Add the remaining dry ingredients and stir until almost combined.
-
Fold in the shredded coconut.
-
Fill the prepared pans with equal amounts of batter, smooth the tops, and bake in the preheated oven for about 22-25 minutes or until a toothpick inserted into the center comes out clean. Allow to cool to room temperature. Tip: Pop the cake layers in the fridge till ready to decorate. This leaves you with firmer layers that are easy to work with.
Cream Cheese Frosting
-
Melt the chocolate over a double boiler. Set aside to cool.
-
Use a beater on medium speed to quickly beat together cream cheese and icing sugar until just combined. You can do this by pulsing the beater a few times or beating the mix for no longer than a minute.
-
Add the melted chocolate, pure vanilla extract and food color (optional) and beat until evenly blended.
-
Whip the fresh cream until soft peaks form. Fold whipped cream into the cream cheese mix gradually until combined. Note: you can alter the level of cream you add. For a firm icing that holds well between layers, make to recipe. For a softer, mousse-like filling add another 50-100ml cream.
-
To assemble, place a layer of coconut cake on your serving plate. Spread a layer of cream cheese frosting and sprinkle some chopped pineapple pieces on top. Add the next cake layer and repeat. Place the final layer and cover the cake with remaining frosting. Tip: you can swap white chocolate with dark or milk chocolate for variations to this cream cheese frosting recipe.


